Microsoft Power Automate: Setting Up Lookup Value Using the CDS Connector
Learn the essential steps to set lookup values in Power Automate. Our detailed guide will help you optimize your automation processes effectively.
Table of Content
Please note: The CDS Connector is now referred to as Dataverse. This blog was written prior to that change. For a detailed demo on how to set up Lookup Values in Dataverse see our new article.
As you may know, Common Data Service, the sophisticated and secure backbone that powers Dynamics 365 and Microsoft Power Platform, has been renamed to Microsoft Dataverse. But in the world of Power Automate, the connector is still labeled as Common Data Service, which might change soon (no surprises there)!
The “Current Environment” version is more feature-rich than the previous CDS connector, but it does have a few idiosyncrasies to look out for. One of these is the setting and clearing of a lookup value (entity reference) on a create/update operation. In the old connector, you could just use the unique id (GUID) of the entity you wish to set, and all would work fine. However, with the latest connector, this is not the case.
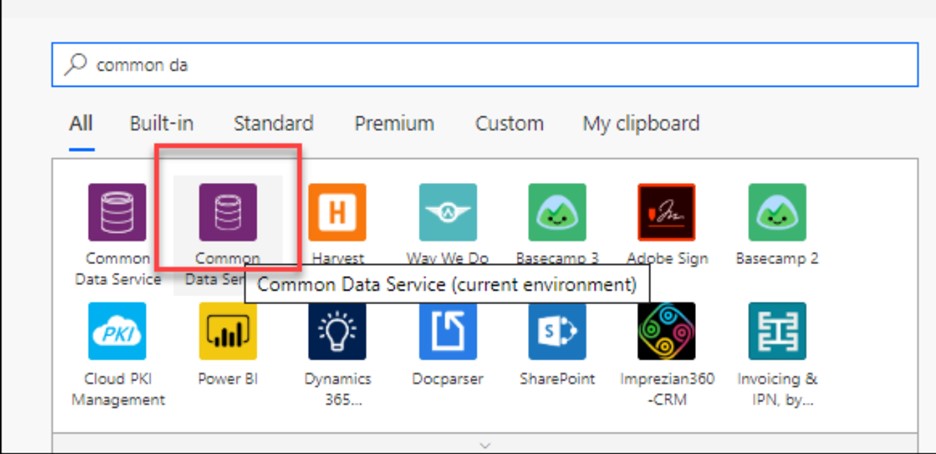
When you select a Trigger or Action and search within Common Data Service, you will see two CDS connectors. For this article, we will use the new Common Data Service environment.
In this simple example, when a Contact is created, it will automatically create an Account for that Contact and set the Primary Contact on that Account to the newly created contact. You used to be able to select the Contact id from the Dynamic Content (from the Create trigger) and drop it into the Primary Contact lookup field on the creation of the account, as shown below, and it would all work within the old connector.
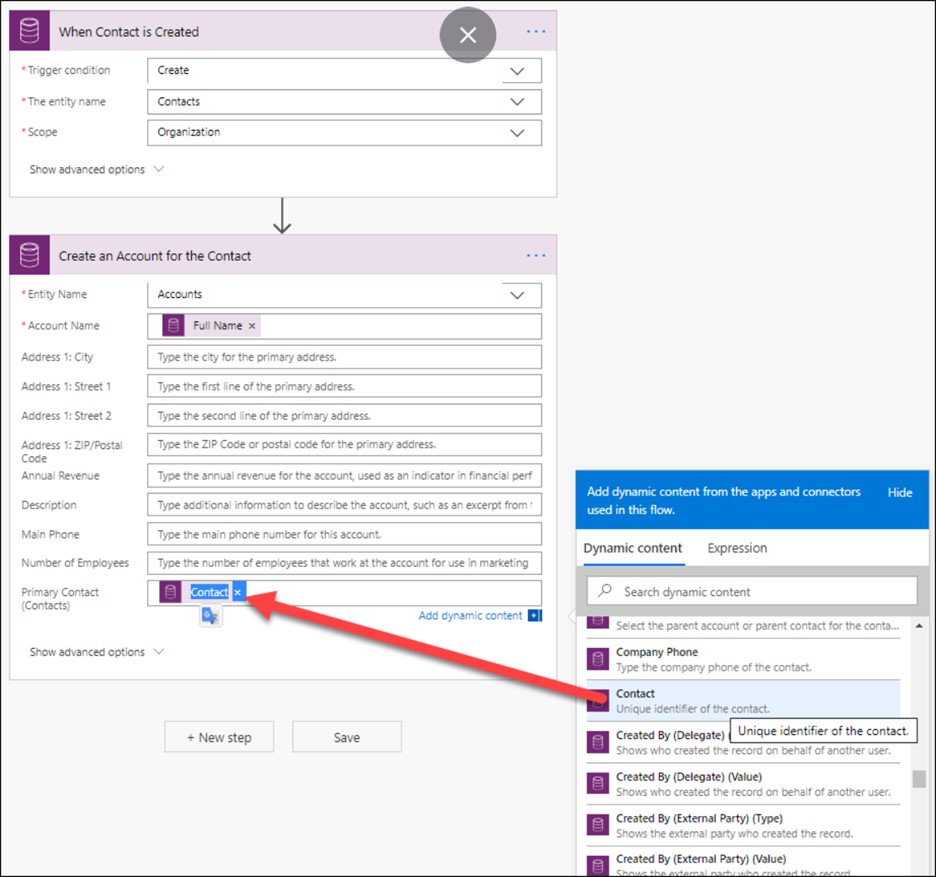
However, if you do this in the “Current Environment” connector you get a “Resource Not Found for Segment” error when the Flow is executed.
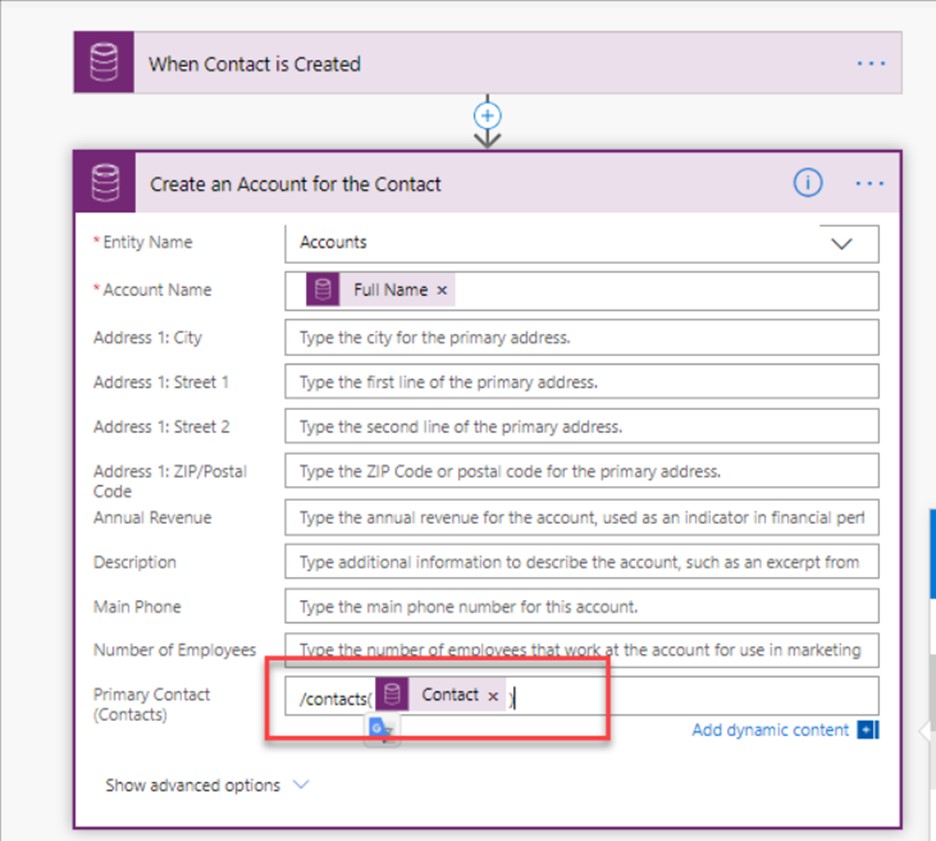
The way to resolve this is by formatting it as you would if you were setting the single-valued navigation property using the @odata.bind annotation (see Associate entity records on create as an example).
The format is a “/” followed by the entity’s plural name, followed by the unique ID wrapped in parentheses. For example, /contacts(00000000-0000-0000-0000-000000000001).
Test Flow using data from a previous run.
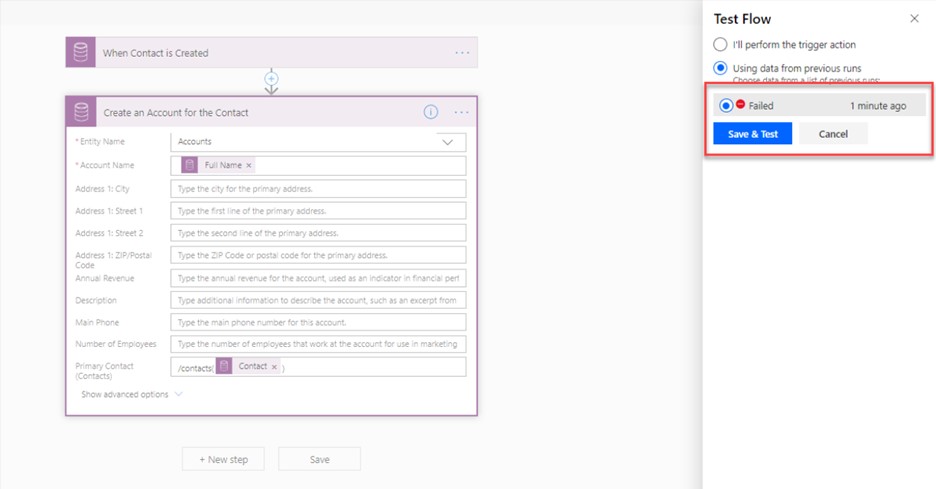 As you can see, the flow will now run successfully.
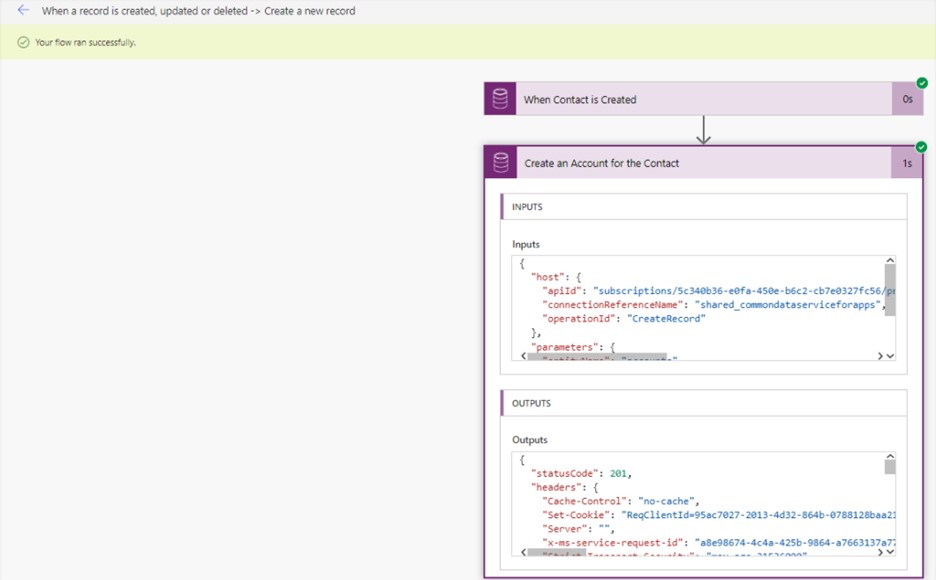
Let us look at the Account record to confirm.

In the new CDS connector, you need to use the new “Dissociate entities” action to clear or remove lookup values.
Note: This has recently been renamed so it may now appear as “Unrelate records” but it is the same action under the hood.
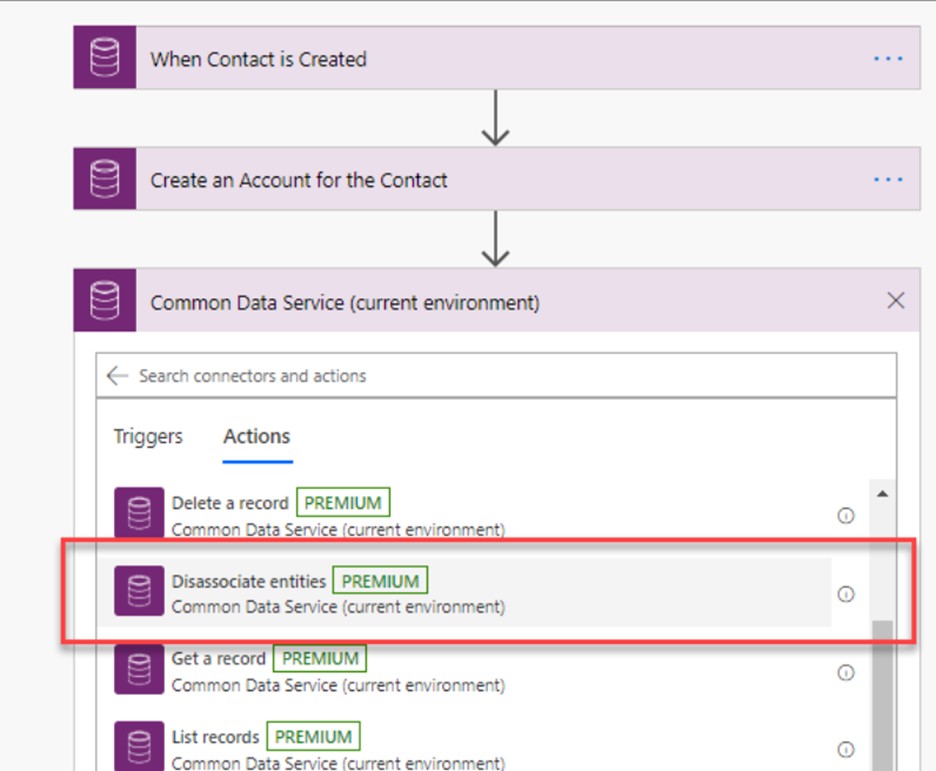
This might seem slightly counter-intuitive, but the Entity Name should be the name of the entity reference you are trying to clear. The Item ID should match the associated Item ID.
You then choose the applicable entity relationship to disassociate, in this case, account_primary_contact. Finally, specify the Disassociated Item full URL identifier as shown below.
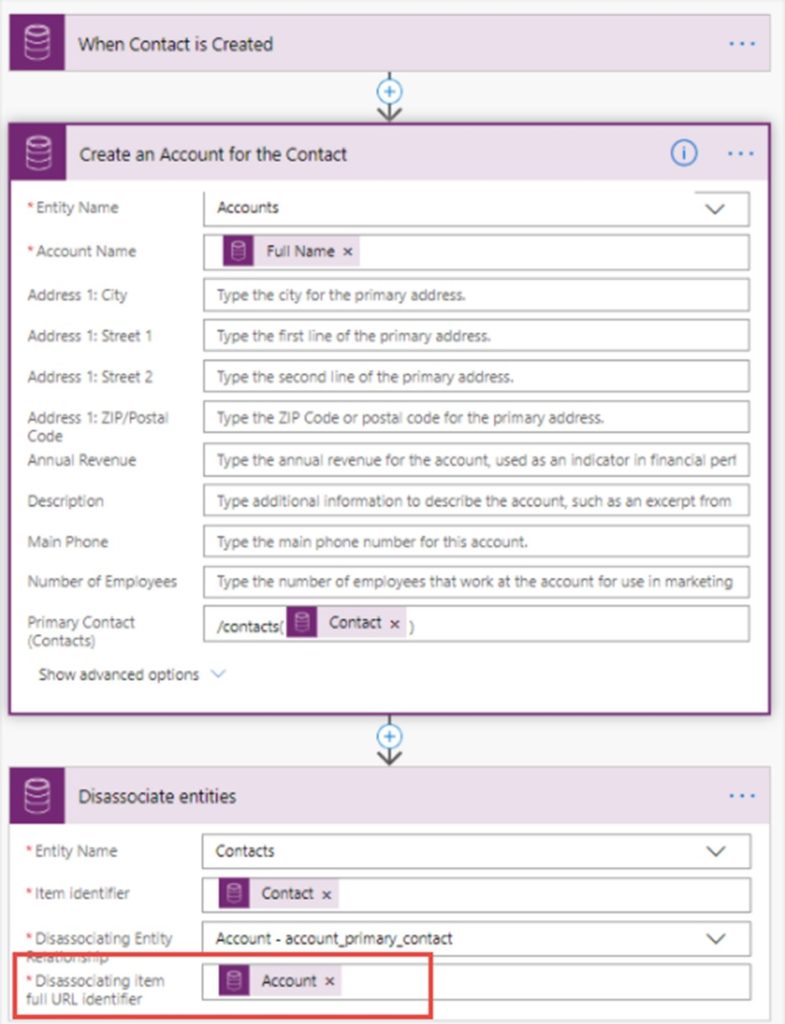
The newly renamed version look like this:

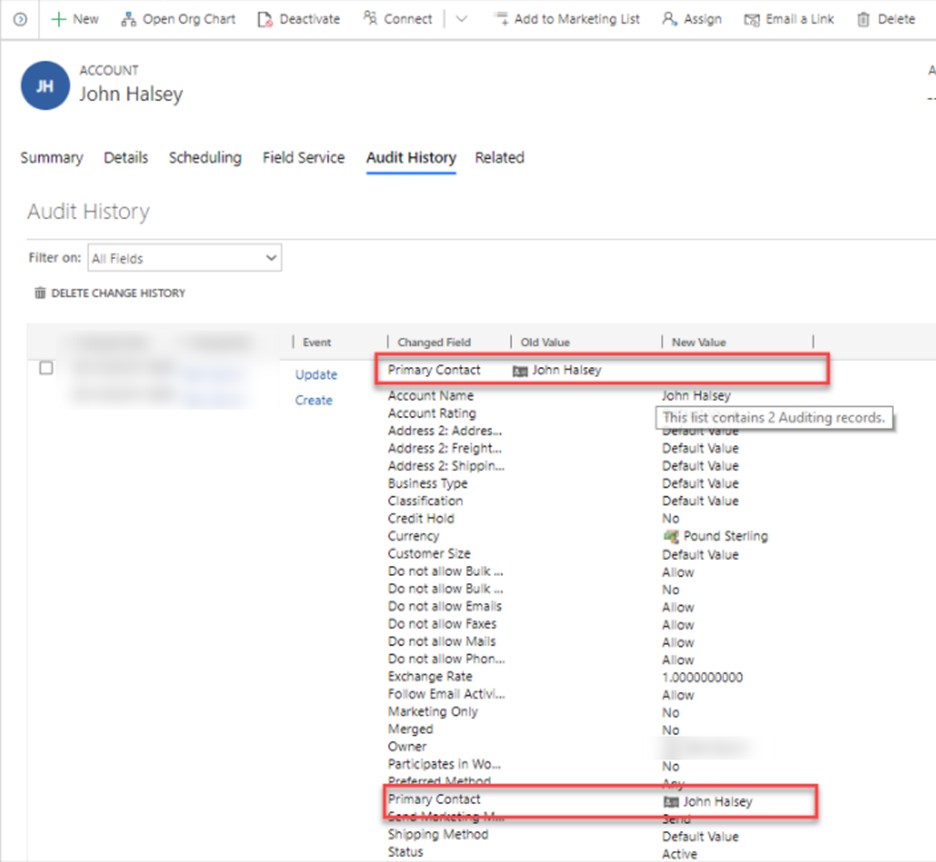
Now, when I create the Contact, the Account will originally get created with the Primary Contact as the created contact — subsequently, this will be cleared by the “disassociate/unrelate” action.
Contact “John Halsey” has been created.

The account created with the Primary Contact that is then cleared.
Learn more on how Power Automate can help optimize your workflow.
Talk to us about how Velosio can help you realize business value faster with end-to-end solutions and cloud services.
"*" indicates required fields