Top Core Financials Features from Dynamics 365 Finance and Operations Version 8.1
The October release of Dynamics 365 for Finance and Operations (Version 8.1) introduced several, very useful core financials features.
The October release of Dynamics 365 for Finance and Operations (Version 8.1) introduced several, very useful core financials features.
Table of Content
The October 2018 release of Dynamics 365 for Finance and Operations (Version 8.1) introduced several new and very useful features in the core financials management area of the application, along with other new functionalities and enhancements across various other modules, analytics, overall platform, extensibility and more.
In this blog post, we will review some of the key features in version 8.1 under the core financials area, which a lot of end users will certainly fall in love with.
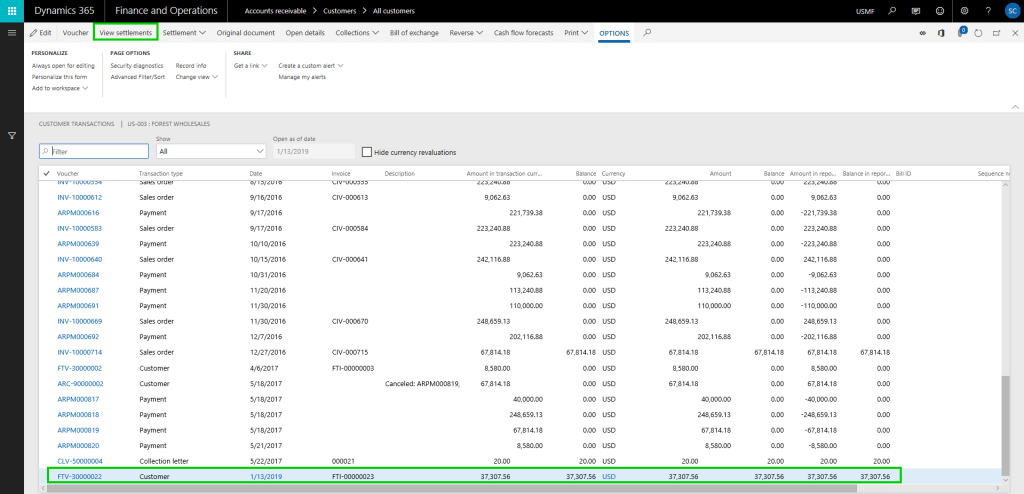
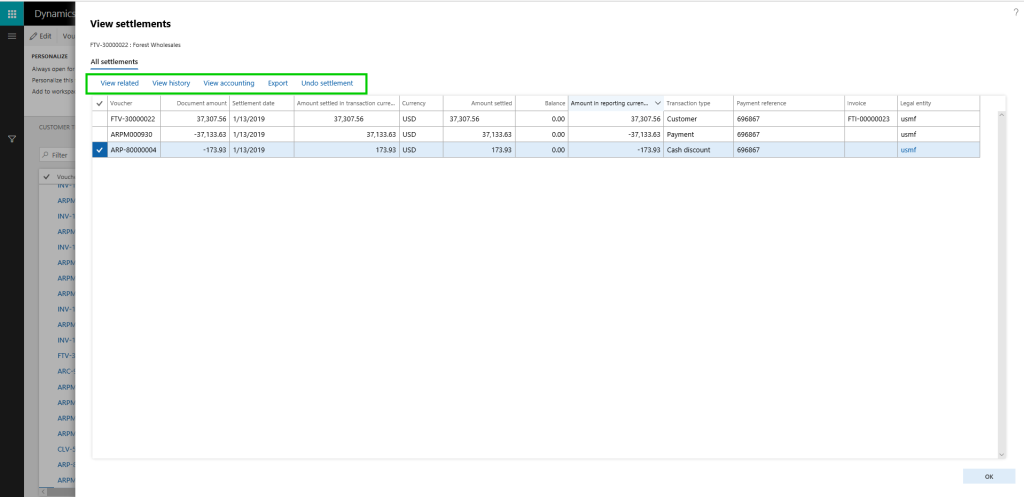
In the past, when you needed to view the settlements on a customer or vendor transaction, you always had to make a few clicks and jump to more than one screen to find the relevant information. With the Dynamics 365 for Finance and Operations version 8.1 transactions form, you can now see the full settlement details, related transactions, accounting, history and more, all at one place.
Here is an example:
A customer invoice is posted. The view settlements form shows just the required details of the invoice.
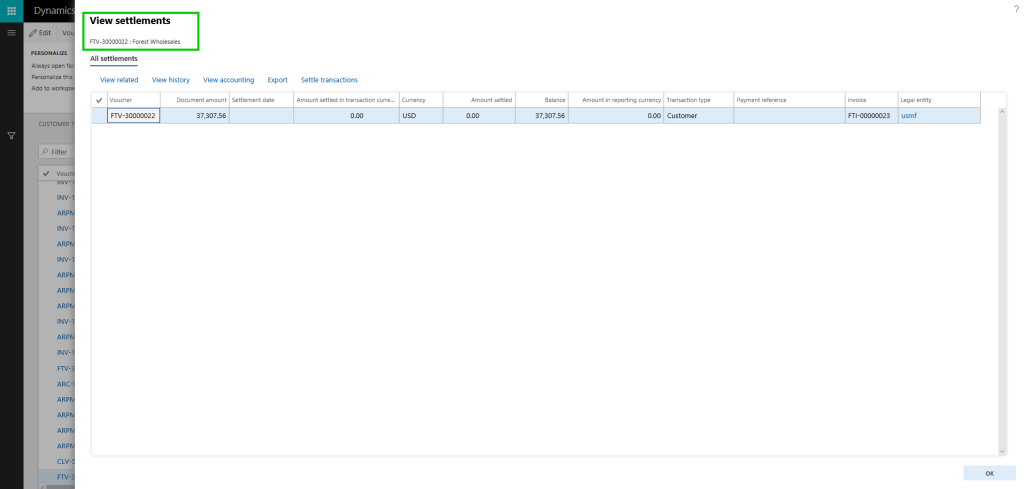
Let us now settle this invoice against a customer payment along with a cash discount. Here is what you will see in the view settlement form:
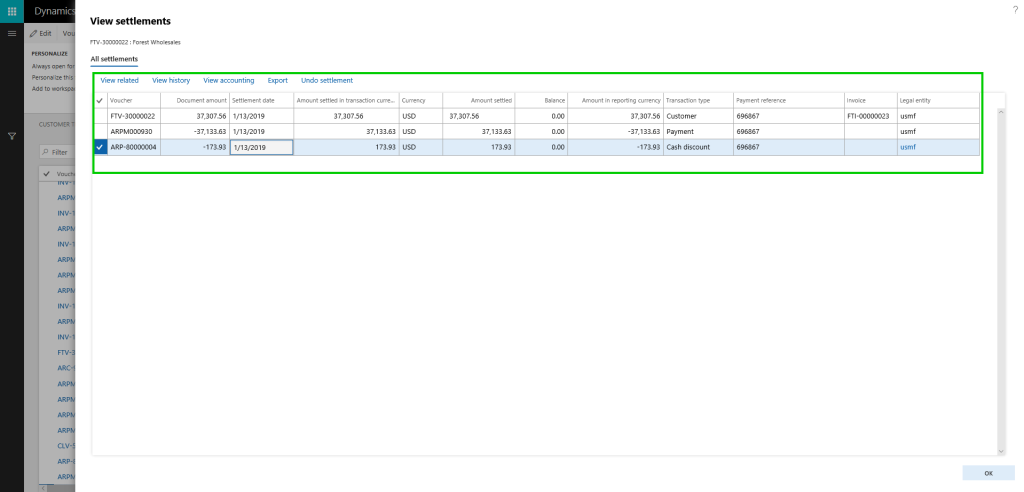
On this new “View Settlements” form, you can,
On the customer and vendor master records, if you want an approval process to be in place when certain data fields are changed on the customer or vendor records, you can now enable that functionality optionally. This is a pretty neat feature which lets you chose which data fields you want to control from being changed accidentally. You can then configure a detailed single or multi-step approval process so that the changes can be reviewed and approved before the new field value comes into effect for the customer or vendor.
The first step is to enable the approval process. As I mentioned, this is completely optional and if you do not need it, you can just leave the feature turned OFF.
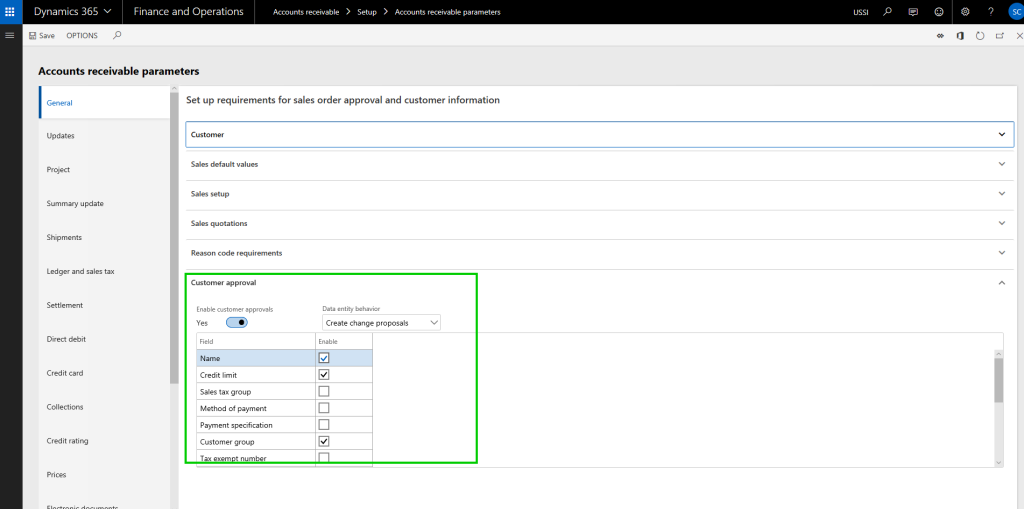
To enable this, go to Accounts Receivable > Setup > AR Parameters form and mark the “Enable customer approval” check box under the General tab.
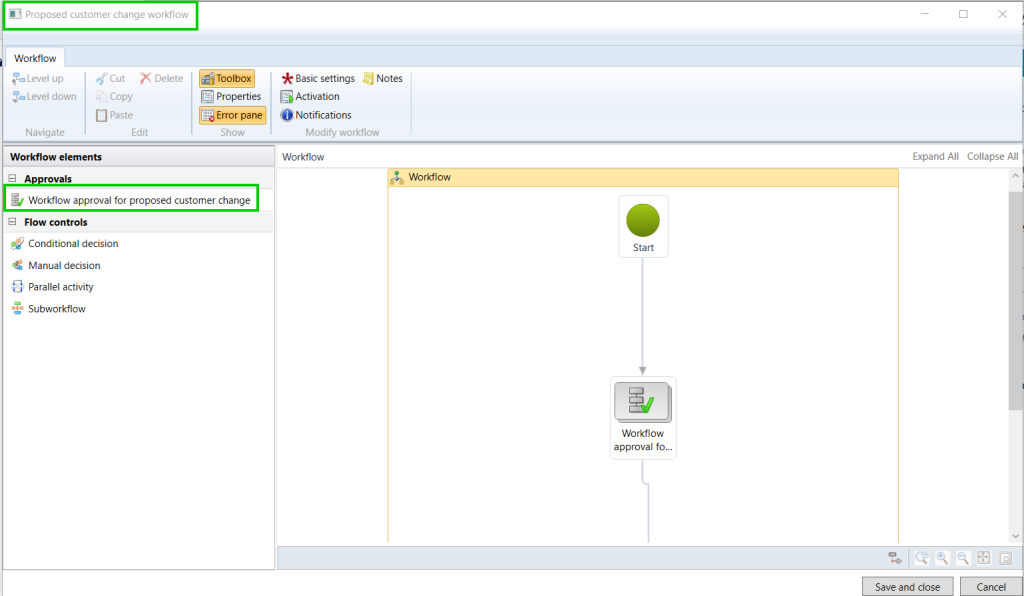
The next step is to actually configure the approval workflow, which will be used for routing the proposed customer account changes for review and approval. This workflow is similar to other workflows in the system. For this example, I have setup a basic workflow with a one-step approval process.
Let us now see this functionality in action. Navigate to the customer master and you will notice that the data fields you have selected in the parameter screen will now show as “requires approval”.
This is super helpful and communicates to the user that this field, if changed, will require approval.

Let’s try to change the customer credit limit and customer group field. When you save the changes, the system will create and show the change proposal, which shows both current values and the proposed changed. At this point, the user if wishes they may discard the changes made.
Notice now that the status of the Customer account says “Changes not submitted”. One important thing to note here is, when the changes to the data fields are being processed you can still transact with the customer. The system will just use the current values.
Once you are done with the changes, click Workflow > Submit to submit the changes to the workflow for review and approval. When the changes get assigned to the approver, they can view the proposed changes on the customer record directly.


The changes to the data fields will come into effect after the change proposal has been approved. It works the same way for vendor records as well.
In many of the implementations I have done, a common client requirement is to have some of the master records such as Item, Project, Customer etc. to be configured as one of the financial dimensions, so that customers can do adequate financial reporting on those. We use Derived dimension values for this and often end up having to select the financial dimension value manually on the master data record or we end up doing additional customization to automatically populate this value when new records are created in the master data table.
With this functionality, you do not need to customize or even setup the dimension value manually when new records are created. If enabled, the system will automatically set these up now. Let us see this in action.
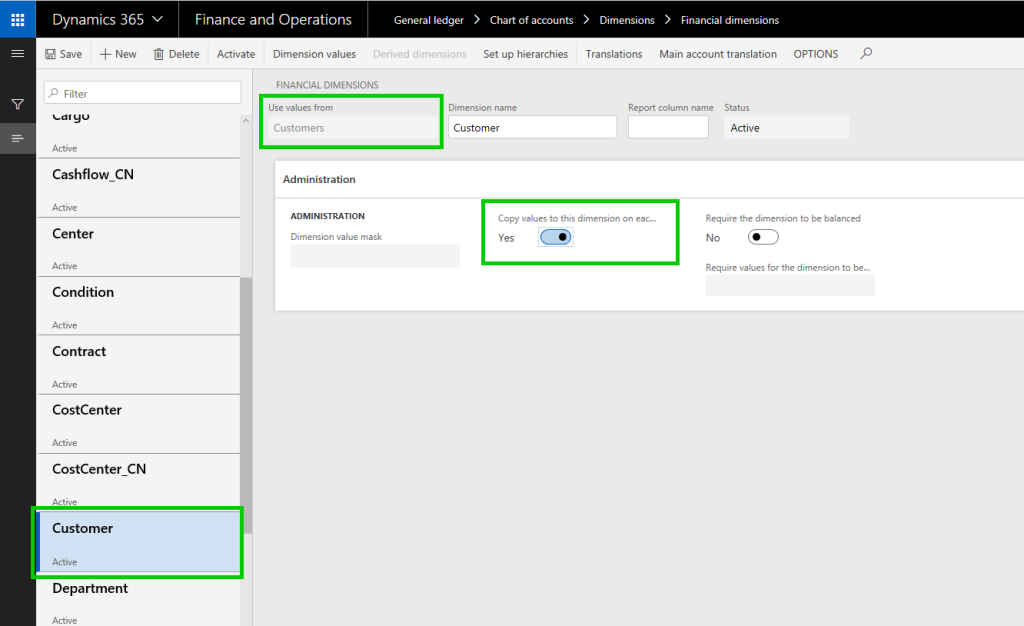
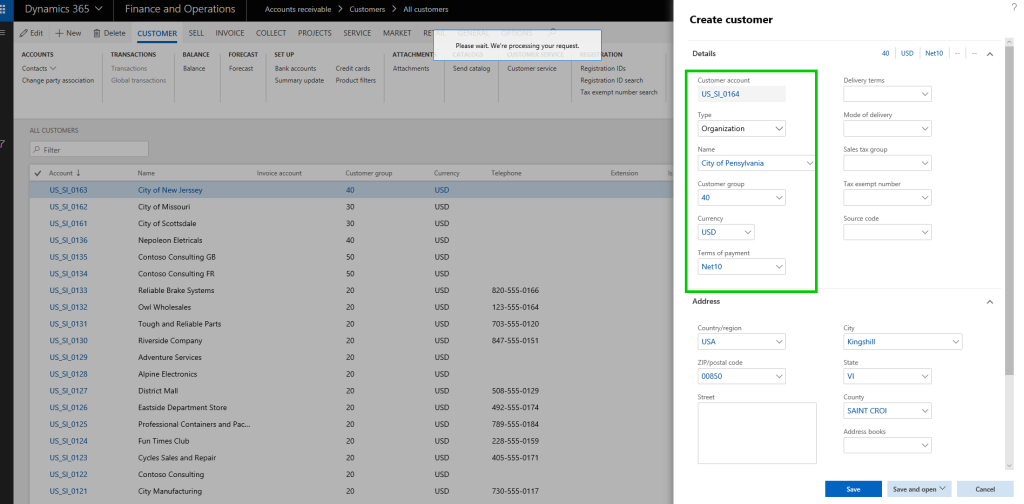
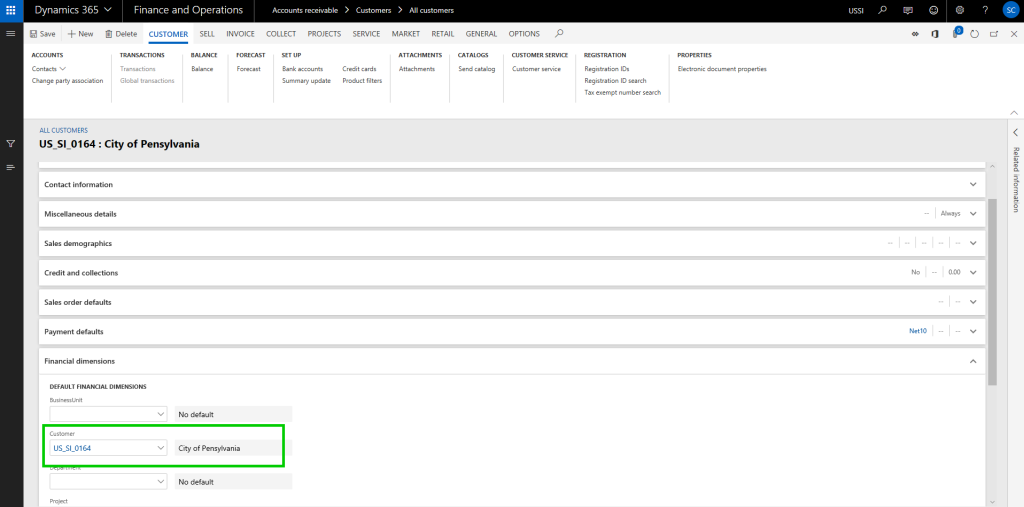
Additionally, you can setup certain dimension values to be defaulted when you select another dimension value. For example, when you select a specific business unit, you can have the system automatically default a cost center value for you.
To set this up, go under Financial dimensions > Select the dimension record and click Derived dimensions button. Here you can setup the value combinations of the defaulting of dimensions.
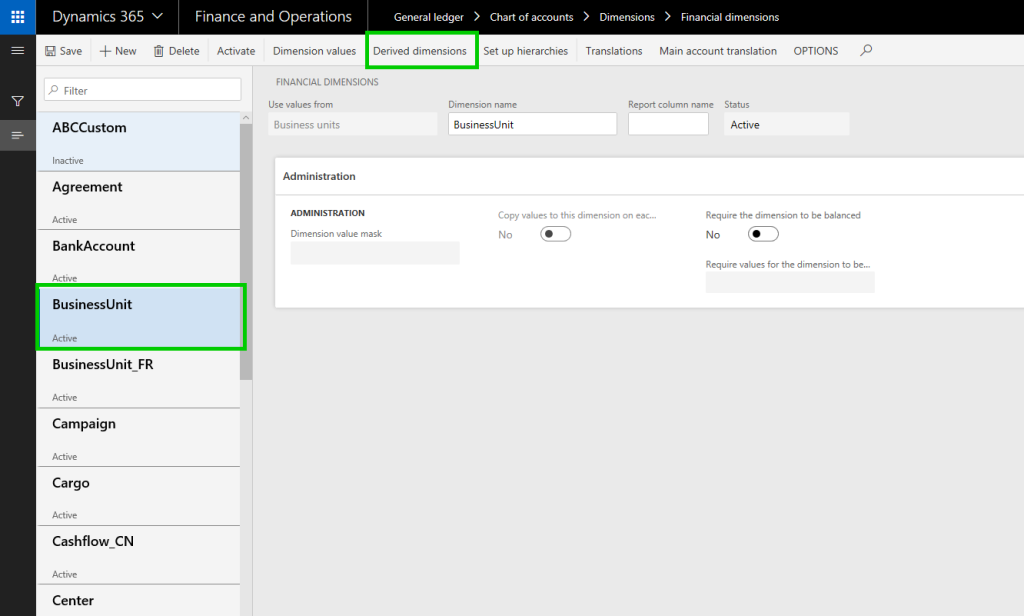
In this example, I have set up Cost Center and Department values to be defaulted when I select a certain business unit. You can see the results below.
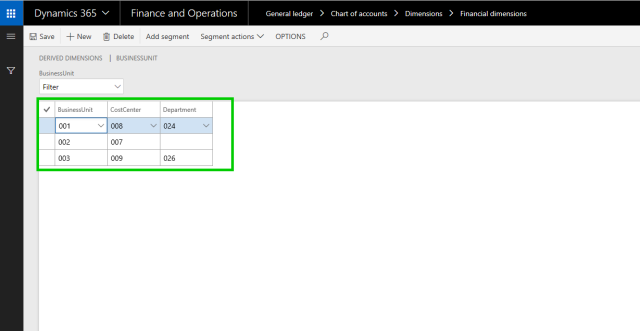
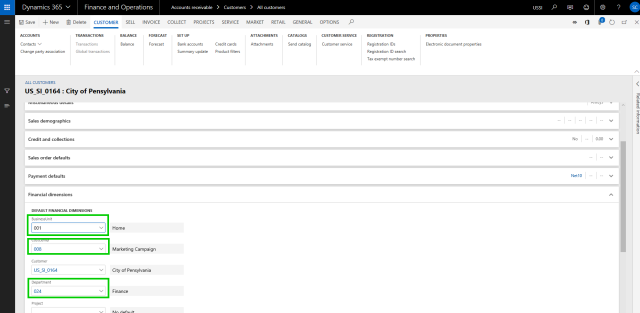
With the above setup, when I select the Business Unit dimension on a master record setup such as Project/Customer, the Cost center and Department dimensions will be auto populated.
For example, when I select Business unit 001 on my customer record, the Cost center and Department values auto populate.
The same defaulting functionality works on journal entries as well. For example, when you do a general journal entry and select the Business Unit dimension, you can have other dimension values defaulted (as long as they pass other account structure related validations).

Additional functionality to simulate posting during journal validation is available, which allows you to run the whole posting process without actually posting the journal. As a result, you can see possible errors, messages, or warnings and you can take corrective actions on the journal.

The global shared number sequence functionality allows you to use a single number sequence across many legal entities for customers and vendors. With this, you can also copy customers and vendors easily between legal entities.
Note: This functionality is not a replacement of the Virtual company feature by any means. It is just a possible alternative that can be leveraged to have the same customer ID and info for one customer across multiple entities, but each will live as separate data records and have their own transactions.
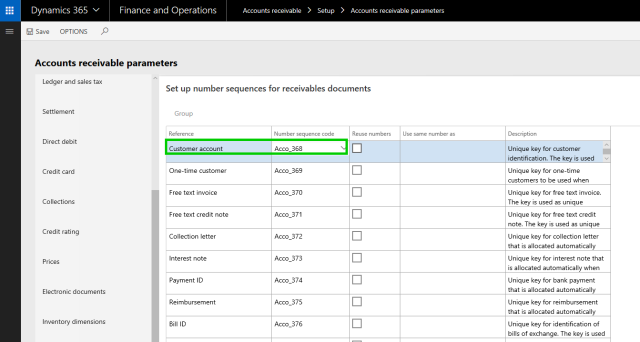
The first step is to configure a shared number sequence.

Then you need to select the same number sequence code for the customer account under the AR parameters page in all of the entities where you want to use the shared customer account ID.
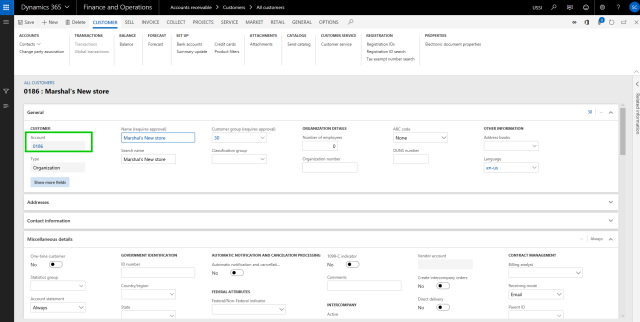
In the USSI entity, I have created a new customer account. Notice that when you create the new customer, the system does not assign a customer account number immediately. Therefore, if you want to copy the customer from another entity, the system will use the same customer account number. If not, the system will assign a new, shared number after you save the details on the customer.

As you can see below, the system assigned a customer account number using the shared number sequence we had setup.
The next step is to copy the customer in the USMF entity. First, navigate to the customer master record in the USMF entity and click New on the All Customers page. Next, type in the customer name you want to copy. The system will automatically find the match and if they are an existing customer in another entity, it will present an option to copy the customer account.

You will now see that the customer information is copied into the USMF entity with the same customer account number.
Note: You will need to make sure that all the dependent data fields for the customer account are correctly setup in both entities.

If you are using shared number sequence for customers/vendors and have copied the accounts between multiple entities, you would obviously want to see a centralized view where you can see the transactions of the customer and vendor in all of the entities they are copied in. I have already posted some transactions for this new customer “Marshal’s New store” in both USSI and USMF entities.
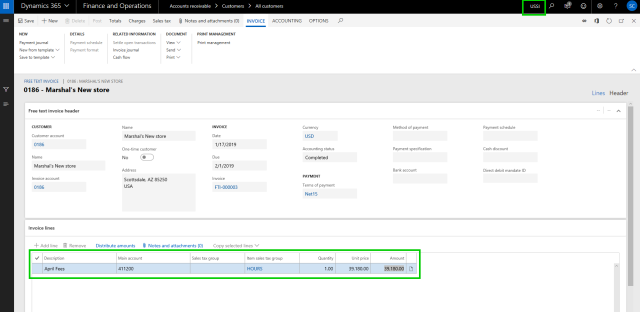
Here you can see the invoice posted in USSI:
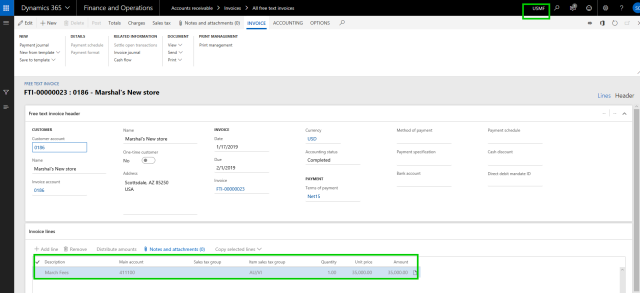
Below you will see the invoice posted in USMF:
Now let’s see how it looks in the new global transactions page.
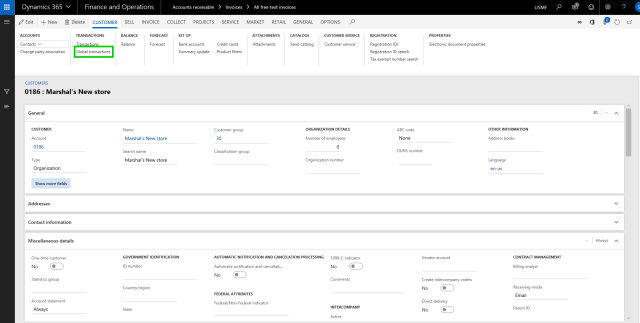
Notice that the new page shows of the transactions for the customer account from multiple entities. When you select the transaction for the specific entity on this page, the system automatically switches the company account, so that you can perform required operations on the transaction correctly.

If you are having trouble using these features in Dynamics 365 for Finance and Operations or have questions about other platform capabilities, contact our Dynamics 365 consultants.
Talk to us about how Velosio can help you realize business value faster with end-to-end solutions and cloud services.
"*" indicates required fields